Open post
pier fishing rod setup

Pier Fishing Rod Setup

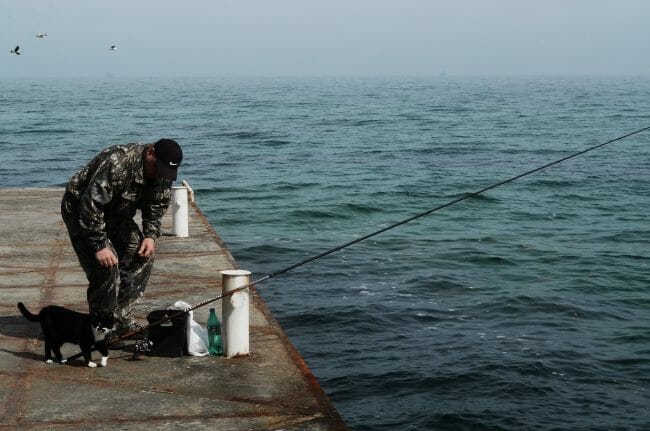
If you are just starting out fishing on your local pier then you may be a little confused as to all of the advice you will get online about what kind of pier fishing rod setup you should use.

The number one thing to remember is that you need to match you rod to what you will be fishing for and just how exactly you’ll be doing it.

If your is to use small jigs then a big beefy rod is not going to give you the type of feedback that you will need.

And, conversely if you are targeting much bigger species that require and rod and reel setup with a lot of backbone then a lighter setup is virtually useless. 

If you can have a chat with the local fishermen that are already fishing there. Some of them may well be fishing on that same pier all their life and their advice will be thoroughly invaluable when it comes to what kind of tackle you will need.

For the most part you reduce down the number of different setups to just three:

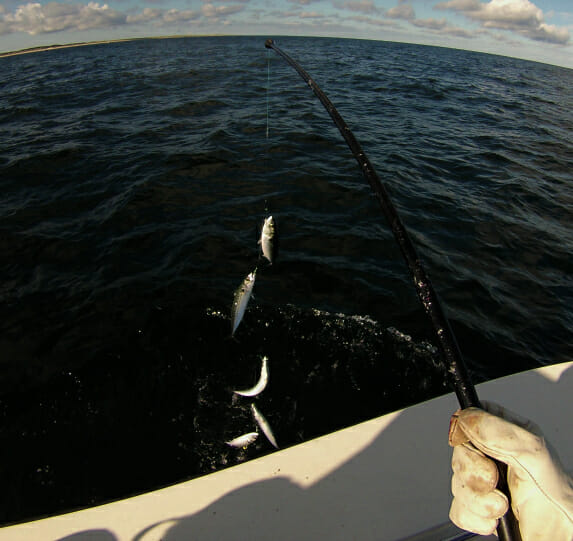
  1. Light – for jigging, catching baitfish and other smaller species
  2. Medium – for bait work and light lure casting
  3. Heavy – for large species and large lure casting work

​However, if you are just starting out then I would recommend just one rod and reel as your first purchase.

A good pier fishing rod for a beginner would be roughly 7 feet in length and have a medium power rating. Paired with a spinning reel and 15 lb mono. 

​This is a fairly generic type of rod and reel that can over a lot of species and as ever with pier fishing it really does depend on your local pier and what type of fish you will target regularly.

​3 Pier Fishing Rod Setups 

​1. Light Setup for Jigging/Baitfish

For catching smaller species and baitfish then you are going to need to use some light tackle.

​When using light tackle I would always opt for a spinning rod and reel for pier fishing as they are better at handling lighter lines.

If you are doing a lot of finesse style jigging then you will need to have a lot of feedback from the jig back through the rod, you won’t get this kind of sensitivity with a heavy rod.

Graphite is usually preferred over a fiberglass rod when doing lighter work as again they will have much better tip sensitivity.

Aim for a 6’6″ to 7′ foot rod with a medium/light power rating and a fast action or a moderate/fast action.

​You’ll need to pair a reel to that rod and a size 2000, 2500 or a 3000 depending on the rod and reel choice as each manufacturer is different.

You’ll need 10 lb monofilament or 20 lb braid. Mono has a bit more stretch in it but is better suited to beginners. Braid on the other hand has very little stretch which is great for jigging but it can result in wind knots.

​2. Medium Setup for Bait/Lure work

A good medium setup could easily end up being your most used out of all three. When you are targeting fish in the 5 to 10lb range then a good choice is still a spinning rod.

Aim for between 7 and 8 feet in length and a medium/heavy power rating.

That extra length gives you both the ability to cast longer distances and also can help to steer fish away from the pylons beneath the pier which is usually their natural reaction once hooked.

Spinning reel of 3000 or 4000 and you can load that with 12 to 15 pound mono or up to 30 lb braid.

​3. Heavy Setup for Larger Species and Heavy Lure Work

Bigger species mean bigger stronger tackle especially if you are using large sinkers or casting bigger lures.

If you are not looking to cast any great distance then you can use a spinning rod with a heavy power rating or roughly 9 feet in length.

If you are targeting really big fish like sharks then a conventional rod and reel is the better choice.

​A conventional reel gives you a lot more cranking power.

They can also handle a lot more heavy braid than a spinning reel. Low profile baitcasters are rarely used as the casting distances are normally shorter than if you were doing a lot of heavy lure work looking to cover a lot of open water.

Open post
best pier fishing rod

Best Pier Fishing Rod [Buyer’s Guide]

Pier fishing can b​e one of the best ways to start out fishing in saltwater. There is a huge variety of fish that live in and around the submerged structures of the pier.

​Cobia, Spanish Mackerel, Pompano, Flounder, Tarpon, Redfish even Sailfish and sharks are all available to you throughout the year from a pier.

​Give that there is so many different species that range from smaller baitfish all that way up to sharks then it’s pretty clear that the really is no one rod that can handle all of these species.

The best pier fishing rod is one that matches what kind and size of fish that you are targeting.

If I had to be pushed and could only choose one rod for per fishing then I probably go with some along the lines of the following:

  • Type – spinning
  • Length – 7 to 8 feet long
  • Power – medium or medium/heavy

Although not ideal when using a jig rig for smaller mackerel you can still get by with a rod like this and also be able to handle larger species and cast fairly heavy sinkers for bait fishing at the same time. 

You have a choice of either 12 to 15 lbs monofilament or 20 lb braid as your main line.

​What type of Fishing Rod is Best for Pier Fishing ?

​Ideally you would run up to three different types of rods for pier fishing a light and a medium/heavy spinning rods for jigging and bait fishing close in to the pier and a casting rod for throwing larger lures or bait at a distance.

  • ​Jigging/baitfish ​- spinning rod, 7 feet, medium/light power rating
  • Medium Bait/Lure​ – spinning rod 8 feet, medium/heavy power rating
  • Larger species – spinning rod or conventional, 9 feet, heavy power rating

​Materials wise your choice is between a fiberglass or a graphite rod blank.

Fiberglass is much tougher and pier fishing is particularly hard on rods. However, they are also slightly heavier and if you are doing a lot of casting or jigging then a lighter graphite rod is the way to go.

It you are just dropping bait down from the pier then fiberglass is the better choice. Graphite is pretty brittle/fragile and if you are leaning it against the hand rail of the pier it is much more prone to getting damaged.

​What is the Best Length/Size Rod for Pier Fishing ?

​A good length/size rod for an all round pier fishing is roughly seven to eight feet in length.

Longer rods are better casting but not that great up close, shorter rods will be better for jigging and dropping bait down vertically but make it harder to turn a fish if they decide to run under the legs of the pier.

The sweet spot in length allows you to turn a fish away from the pier pylons with out it being so long like a surf rod that it will become awkward and cumbersome to use on a busy pier.

The first three rods below are better suited for lighter work especially if you are a beginner.

​Best Pier Fishing Rod

1. ​Penn Battle II Spinning Combo

​Our first pick is actually a pier fishing rod and reel combo, the Penn Battle II spinning combo is an excellent choice if you are just looking to try your hand at fishing from a pier for the first time.

For a beginner a combo is a a real no brainer and it takes out any of the guess work when it comes to making that all important choice.

​Penn are one of the most respected names in saltwater tackle and this pier combo is no exception when it comes to their legendary quality and reliability.

A combo like this gives you a perfectly matched rod and reel for pier fishing and also when bought as the one deal you’ll also get a decent saving over buying a separate rod/reel.

The Battle II reel is the real star of the show and although you might out grow the rod, the reel if maintained correctly should still be working away in ten years time.

​For light work the 2500 size is great for jigging and targeting smaller species. The rod is a medium/light power rating and the rel can hold 140 yards of 10 lb mono or 160 yards of 20 lb braid.

For larger species and bigger baits you can go up to a 4000, which would cover you for a lot of different species and different rig setups.

​Specifications:

  • ​Penn Battle II high quality reel
  • Range of reel sizes, rod length and power/actions
  • Aluminum oxide guides

​2. St Croix Mojo Spinning

​Don’t let the name fool you although not strictly what some anglers would consider a pie​r rod the Mojo inshore series from St Croix are excellent rods for jigging and light lure work around structures.

​If you are routinely throwing a lot of light lures and smaller jigs depending on your location. If that is the case then you will need a graphite rod that has a lot of sensitivity.

​A more sensitive rod with a fast action and responsive rod blank is a must when targeting smaller species on light tackle.

Fiberglass rods will not give you the kind of feedback that you need. Clear and crisp tip sensitivity can make or break your jigging.  

​All of the rods have a fast action and are available in a ice pread of power ratings.

​Specifications:

  • ​Aluminum oxide guides
  • SCII graphite
  • Fuji reel seat
  • Split grip cork handle
  • 5 year warranty

​3. Shimao SE Teramar Spinning

​The Shimano South East Teramar Spinning rods make great all rounders.

They come with very high spec hardware like Fuji reel seats, Hardloy guides and a premium cork handle.

​The 7 foot medium action rod will cast 1 ad 2 ounce lures or weights a mile so if you are looking to get out from the pier this is a solid choice.

​Specifications:

  • ​TC4 rod blanks
  • Fuji Hardloy guides
  • Fuji reel seat

​Pier Fishing Rods

​If you are just starting out pier fishing then I would strongly suggest that you should target smaller fish that are under five pounds and that you buy a pier fishing rod that is suitable for this type of fishing.

Learning how to rig a bait and cast smaller lures is the single best way to improve your knowledge and experience.

Why?

Because you will probably catch more fish than if you are to target larger species. It’s all about practice and working your way up from the easier to catch smaller fish eventually to the large ones once you gain the skills and experience.

You can have a lot of fun catching strings of mackerel on a sabiki rig and with a light enough spinning rod you will not need anything like a dedicated sabiki rod that you will see on a lot of boats.

For this I would suggest a good inshore spinning rod as your first pier fishing pole. Spinning reels are more forgiving than a conventional or baitcaster.

Casting is much easier with a spinning setup. Casting should not be a bottle neck that stops you from catch especially when you are fishing right above the fish on a pier.

When you are using a bobber with bait or lure and jigs a good spinning rod can handle all with ease.

Ask around on the pier and look for guidance from the more experienced fishermen. They can point you in the right direction when it comes to what type of tackle and bait to use for that particular pier.

You can choose either a fiberglass or a graphite rod , but if it is your first time fishing then a fiberglass rod will be an excellent per rod for a beginner.

They are all lot tougher and can take a lot more abuse than a graphite rod blank.

When resting your rod up against a pier all day it can take a lot of abuse and a very light fragile graphite rod may not always be the best option, fiberglass however can take a lot of scrapes and knocks without losing any strength.

Open post
flounder gigging lights for wading

Flounder Gigging Lights for Wading

If you don’t have a flounder boat available to you or are just starting out in gigging then wading along the shoreline or sandy flats can be the best option. 

Along with the gigging pole the gigging lights for wading that you use are going to be one of the most crucial items of your flounder gigging equipment.

You can find some commercially available AA battery powered lights but they really are no match for an LED light run off of a 12v battery. 

A good battery should weigh anywhere from 5 to 8 pounds and if you have it in a backpack the load can be very easily spread across the shoulders. You’ll probably be wearing a pack anyway to hold water and extra gear.

Flounder Gigging Lights for Wading

Below we have listed two ready made solutions both of which will run off of a 12v DC battery.

If you want to make your own custom built gigging light for wading then you will find a list of the materials that you will need lower down the page.

1. Boat Lights Flounder Gigging Light

This purpose built flounder gigging light for wading is made in America by Boat Lights US.

It is 50 inches long and weights just a little over 2 pounds so it’s quite light and is suitable for use by kids also.

It requires a separate 12v battery which is connected via either alligator clips or spade connectors.

The light head gives out 2200 lumens from 6 high powered LED light. The head is set an angle that’s just right for wading in the shallows.

The six LED’s are arranged in a flat side-by-side configuration. This gives the best spread of light. You do not want a narrow focused beam when flounder gigging. A large spread allows you to cover a lot of ground more quickly.

The main arm is made high quality PVC which is both stiff and light. Pair this with a small 12v battery in a backpack and you shouldn’t real feel any weight even after hours of use.

Specifications:

  • 2200 lumens
  • 18 watt output
  • 6 foot battery cord
  • 50 inch long, weighs just over 2 lbs

2. AlumiGlo FlounderPro

The FlounderPro from AlumiGlo is another purpose built solution. It looks a bit more polished than the pole above but has a slight drawback in that the LED’s are arranged in a circular pattern.

Ideally they would be flat to give as much light spread as possible. Saying that it is a high quality light with the added bonus of a shoulder strap.

Again you’ll need to pair this with a 12v battery. It weighs in at 2.3 lbs which slightly heavier than the Boat Lights US model above but that little weight is hardly noticeable.

Specifications:

  • 2850 lumens
  • 50 inch handle with shoulder strap
  • High grade PVC pole with aluminum light head
  • 2.3 lbs in weight

3. Powerstar 12v 7.5Ah Portable Battery

Almost any 12v portable battery will do as long as it runs about 7.5 Ah from a full charge.

The Powerstar unit listed weighs in around 6 pounds and features a well sealed battery housing and external cover.
Chargers sold separately.

Specifications:

  • 12v portable battery
  • 7.5 Ah
  • Battery life 3 to 5 years
  • comes with 2 year warranty

DIY Flounder Wading Lights

If you are looking to make your own LED wading lights then with a few items you can get a custom built wading stick mage up in no time.

A lot of people like to combine the light onto their gigging pole. So if you already have a pole it is something to consider.

Light choice will usually come down to how much power you want. Remember that a larger light spread is quite important but it still needs to be bright enough to be usable. 

Here’s what you need to make a flounder light setup for wading:

  • PVC or aluminum tubing 3/4 inch
  • 1/4 inch u-bolt
  • Submersible LED light
  • Marine on/off switch plus cabling
  • 12v Battery

The light will be mounted onto the pole using the u-bolt. Depending on the LED that you get you may need to play around with how it is mounted.

The mounting position will be either at the end of the pole if you are using your gig separately or you can mount the light on your gigging pole about half way up.

You’ll need to fix the switch to the LED and then to the battery side of the cable. Try to get a good marine switch as it should stand up to the salt water environment better.

Open post
Best Sabiki Rod

Best Sabiki Rod and Reel for Baitfish

If you are catching a lot of live bait like mackerel and threadfin herring then the best way to haul a tonne of them onboard quickly is using a sabiki rig. A good sabiki rod or two will make life a lot easier.

The biggest complaints you’ll often here about using a sabiki rig is the tangled mess they can become on board when not in use.

That and the fact that you have 6-10 small hooks just waiting to get snagged in something can end up driving you crazy, fast!

​Enter the sabiki rod.

A sabiki rod is a purpose built rod blank that the line and rig run through the middle of the rod rather than through traditional eyes once pulled in. The aim here is to keep the rig and all it’s little hooks enclosed in the rod blank so that once on board they can’t cause any trouble.

​There are usually only two types of sabiki bait sticks available ones with a line guide before the line feeder and ones without.

The sabiki poles that have an added line guide before the line is threaded into the rod blank are suitable for use with both baitcaster/conventional type reels and spinning reels.

If the rod blank does not have a line guide then it usually best not to use a spinning reel with it.

On a boat I always favor the conventional reel than a spinning reel as you will be essentially vertically jigging the sabiki rig and casting is not an issue.

Best Sabiki Rods

1. AHI USA Sabiki Stick Bait Rod

​The Ahi USA rod is suitable for use with both spinning reels and baitcast/conventional reels. 

So if you are on a pier and are casting opt to pair it with a spinning reel. But, if on a boat and vertically jigging them the conventional reel is the best choice.

​You have the option or either a 7 or an 8 feet model and to be honest the choice should be determined by how long your sabiki rig is going to be. 

Choose the 7 foot model and an 8 foot length of jig then you’ll either have to contend with and extra hook hanging freely when all others are covered or just cut off the last one.

​If you are in a kayak the 7 footer may be easier to handle.

It breaks down into 3 small pieces so is easy enough to transport and this also make it easier to thread the line through it when you first set it up.

​Specifications:

  • ​8 foot in length
  • Suitable for both spinning and baitcast/conventional reels
  • Great build quality
  • Available in both 7 or 8 feet options
  • Canvas carry bag included

​Buy on Amazon


​2. EAT MY TACKLE Sabiki Rod

​This is a 7 foot option from EAT MY TACKLE which makes it more suitable to kayaks or smaller fishing boats.

​It is a two piece rod making transport and storage quite simple.

Unlike the AHI rod above it does not have a line guide before the opening for the line in the blank so it is suitable for baitcast/conventional reels only.

​Not really suitable for casting your sabiki rig any meaningful distance unless you have a fairly heavy weight on the end of the rig.

​Specifications:

  • ​2 piece, 7 foot rod
  • Baitcast or conventional reels only
  • Strong fiberglass construction
  • Lifetime warranty

​3. Promar Sabiki Stick

​The Promar Sabiki Stick come in either a 7 or 8 foot option.

They can handle any kind of reel so a spinning reel is an option here if you do not want to use a baitcaster.

​It breaks down easily into three sections and also comes with a storage bag. These rods are very well built and can take quite a bit of abuse.

​Specifications:

  • ​Three piece
  • 7 or 8 foot models
  • 1 line feeder guide
  • Comes with a storage bag

Sabiki Rod and Reel Combo

Purchasing a sabiki rod and reel combo as an all in one deal is a great way to get serious value for your money.

You can also rely on the rod and reel being perfectly suited to each other.

The Eat My Tackle Combo below is the best of the bunch.

​Eat My Tackle Sabiki Combo

​The Eat My Tackle sabiki combo is the perfect solution to your bait fishing needs.

Just spool on some mono, attach your rig to the main line and you are good to go.

This is the eight foot rod  from Eat My Tackle as seen above.

​The reel is a light-weight conventional reel that can hold up to 120 yards of 10 lb mono and is perfectly matched to the rod.

It is a right hand retrieve, has a star drag and a one way clutch.

​Specifications:

  • ​8 foot rod
  • ​Gear ratio 5.0:1
  • Holds 120 yd of 10 lb mono

​Sabiki Reels

​Although you can use spinning reels with sabiki fishing rods my preferred setup when jigging from a boat is to use a small conventional reel.

​The best time to use a spinning setup is when you are casting from a pier. Sabiki rigs can be quite light and casting them any kind of distance from a pier using a conventional reel can be a little difficult.

But on a boat hands the conventional reel the way to go.

You don’t need anything to fancy, a plain level wind with a line counter works great.

​Always make sure to rinse your reels in fresh water after use, it will improve their lifespan significantly.


1. Penn Rival Level Wind

​The Penn Rival level wind conventional reel is a no frills lightweight reel that won’t break the bank.
Although it might be priced on the lower end it still comes with Penn’s legendary build quality.

These are perfect a sabiki reels and will not break the bank.

​For such a small and light conventional reel the Rival is still built from some very high quality materials. Marine grade bronze alloy main gear and carbon fiber drag washers ensure a smooth operation.

The smaller model is best suited for bait fishing and can hold 475 yards oof 15 lb monofilament fishing line.

​Specifications:

  • ​HT-100 carbon fiber drag washers
  • 2 stainless steel ball bearings
  • Frame and sideplates from lightweight graphite
  • Line capacity rings

​2. Okuma Magda Pro Line Counter

​Okuma line counter reels some of the most reliable available. They are use on large freshwater lakes and for trollig at sea for smaller sized sport fish.

The Magda Pro in the smaller sizes make a great little sabiki reel.

With the added bonus of a line-counter builtin you can always be sure of just how deep exactly your rig is.

​Specifications:

  • ​Carbon drag system
  • Built in linecounter
  • 2 stainless steel ball bearings
  • Self lubricating gear system
  • 1 year warranty

​Sabiki Rod

​Sabiki Rods are pretty are a great way to keep your Sabiki rig from becoming a tangles mess. A common complaint with using a conventional rod for a sabiki rig is that once you reel them in and attempt to store them the rig becomes a massive tangles mess.

Not only do the get tangled up on all the rod eyes and main line but usually some of the hooks will end up getting snagged on some thing on the deck of the boat.

For me it was always one of either two landing nets. Hooks just love to get caught in nets and they are a real pain to untangle especially when you could be doing something more fun like actually using your new bait ti catch some real fish.

​A Sabiki rod is essentially a rod that is hollow in which the main line runs through as opposed to conventional rod guides and eyes.

​The design of a sabiki fishing rod is that it is actually wider at the top. The tip of the rod has a large opening. The opening has smoothed sides that allow your rig to enter the tube without snagging. Once the rig is fully enlosed in the rod tube there is no chance of any kind of tangle happening. 

You can usually pair a sabiki baitfish rod with a simple and in-expensive level wind or conventional reel.

Personally I use whatever old reels I have. If a reel has been retired from active duty on my main fishing setup them I’ll re-spool it with lighter line and then use it on my baitfish rods.

Most solid reels will last a long time when used as part of a sabiki rod and reel combo. Just remeber to rinse them out with fresh water after every trip whether you use them or not.

Fall and Winter Fishing

Temperatures are dropping, the leaves are turning colors and the fishing is HOT.   These are sure signs that autumn has started in the Topsail Island area.   

That and those little yellow butterflies we see dotting the landscape.  

Old timers will tell you when the yellow butterflies show up, so do the fish, especially spots.    Ask local fishermen about their favorite fishing season and you likely will hear the word fall mentioned more often than not.

It certainly is the busiest time of year for our ocean fishing piers.  Our sounds, creeks and river have a lot of visitors this time of year too, from near and far away.    As the catches of Spanish mackerel, bluefish and pompano begin to taper off, the Spot, Speckled trout and Red Drum bite picks-up.

Spot is one of the area’s favorite catches this time of year.  Fishermen (and fisherwomen) line the pier rails and waterways.  They come armed with fresh shrimp pieces, blood worms and similar baits.

Many use a typical two-hook bottom rig.  When the bite is hot, you’ll hear that Spot are being caught “two at a time”, meaning both hooks come up with fish on.  Some will fill their coolers with this tasty little fish in just a few hours.

Others are more interested in the Speckled Sea Trout, commonly called “specks” in these parts.   This prized fish is caught year round in our area.  However fall is one of the best times of year to catch them.  They can be found not only in the inshore marshes and creeks but in the surf and from the ocean piers.

Specks are a prized catch and good eating too!  Live bait such as shrimp or finger sized mullet and large minnows are good baits.  Many anglers prefer using artificial baits like Mirrolures or soft plastics on jigheads.    

The live baits are often fished under a popping cork and are retrieved using a jerking motion.  The hard baits and soft plastics are most often retrieved using a zig-zag or jerking pattern and allowing the baits to drop a bit between retrieves. 

Speaking of good eating, another prized fish in these parts is the flounder.  These flat fish are often found in the same places as Specks.  Many of the same baits can be used to target both.   Flounder lie on the bottom and ambush prey when they pass close by .

When jigging for flounder my favorite way to target is with a Berkley Gulp! ® shrimp on a jighead.  I’ll “bounce” it along the bottom with frequent, short pauses. 

If there is a hungry flounder around this will get its attention. 

Topsail Island is blessed with three ocean fishing piers.  These piers offer good access for ocean fishing and amenities such as bait, tackle, rest rooms and even a restaurant. 

Most will even cook your catch for you, adding the sides and a drink for a very reasonable price.  This is fishing’s version of the “EASY” button.  Not that catching is guaranteed but it sure is nice trying from one of our piers. 

Each of our three towns has a pier. So no matter which section of the island you visit or live near, there’s a pier close by.   Seaview Pier is located in North Topsail Beach, (910) 328-3172.  Near the south end of the island in Topsail Beach Township is Jolly Roger Pier, (910) 328-4616.  And last but not least, smack dab in the middle of the island is Surf City Pier, (910) 328-3521. 

And don’t forget about winter fishing.  Our mild winter season provides some of the most serene fishing you will find anywhere.  I love to wet a line on a nice clear, crisp winter day.  There are fewer folks around but still fish to be caught.

Inshore fishing is your best bet this time of year.   The marshes and creeks are the best places to try for catches of flounder, specks and red drum.  Yes, some of each of the species stays here year round.  Not in the numbers found in the fall, but still some to catch for the avid angler.  Just remember a  s-l-o-w  retrieve is key when the water temperatures are below 60 degrees.

So go get ya some. 

Tight lines to all!

Open post
Flounder Gigging Equipment

Flounder Gigging Equipment List – (What You’ll Need)

The minimum basic flounder gigging equipment that you’ll need on your first gigging adventure is an actual gig.

But;

There are quite a few approaches to gigging and not all of the gear or equipment that you’ll need for one is necessary for the other.

Different ways of gigging:

  • Wading
  • Boat
  • Kayak
  • At night
  • Daytime

Below we’ll concentrate on working from a boat and the bare minimum amount of equipment for flounder gigging that you’ll need to get started.

Flounder Gigging Equipment

  1. Gig Pole
  2. Gigging lights
  3. Flat bottom boat
  4. Live well/storage bin
  5. GPS
  6. Safety equipment
  7. Fishing license
  8. Bug spray

1. Gigging Pole

The first gigging poles are probably thousands of years old and made out of wood. Splitting a stick at the end into three prongs and using that to catch fish is an ancient method.

Modern gigging poles however are usually made from metal and feature three prongs. Stainless steel is your best choice.

If you are on a budget you can purchase a spear fishing head and mount it onto an aluminum pole or wooden stick if necessary.

2. Gigging Light

The most productive time for gigging is on a still summers night. Locating the flounder using a light that reflects off of their eyes is crucial to your success.

You have a number of options here. Install permanent underwater lights into the hull of your boat. Mount some lights onto the guard rail as discussed below or use a hand held lamp of head lamp.

Personally I favor a mix of all of them. Permanent underwater lights are not absolutely necessary. Mounting them high up on a guard rail is perfectly fine especially if you happen to have a high powered hand held lamp or head lamp.

If you are wading then a torch can get pretty tiresome after a few hours better off investing in some flounder gigging lights for wading. Flounder gigging on foot can be super productive as it allows you to go really shallow all the time.

3. Flat Bottom Boat

Choosing the correct type of boat for gigging is very important. Given the nature of gigging and where you will be doing it a flat bottomed boat with a shallow draft is the only real option.

A standard Jon boat or any decent small flat bottomed stiff is perfectly suitable for entering the shallows.

Ideally you have an electric trolling motor as they are easy to control and will run fairly silently when compared to your normal outboard motor.

A popular modification is to install some thin aluminum or stainless steel guard rails that allow you to mount some lights on and angle them downwards. They also have the added bonus of letting you lean out across them as you are gigging.

Most boats that are used for gig fishing will tend to have fairly low sides so the added rails really can make life a lot easier.

4. Live Well or Storage Bin

You’ll need somewhere to store your catch away from flies and other insects. A lot of small fishing boats can come with a live well as part of the equipment list.

Unfortunately flounder are a flat fish and their shape can make them a little awkward to get into a standard live well.

If you use a plastic bucket with the lit cut open to just a few inches wider than your gig you can use the lip of the lid to slide the flounder from the gig as you pull the gig back out of the bucket.

Another lid can then be placed on top of this to seal it.

Also Read: Jigging for Flounder

5. Fish finder with GPS

A fish finder is not only good for reading the depth and navigation but it is also useful for two things firstly safety and then the ability to mark a good fishing spot for future reference.

Gigging at night can become disorientating especially if you are constantly focusing on the bottom right in front of you.

Before you know it you can be several miles along especially if using a trolling motor. Using a gps you can set specific alarms if you have moved more than a certain distance.

Also Read: Surf fishing for Flounder

Once you have found a good spot it is usually a good idea to mark it on your fish finder for future reference. Being able to find a spot again after being in there in the dark late at night os not always easy.

All you need to do is mark the spot and you’ll have no trouble finding it again.

6. Safety Equipment

Just because you are gigging in shallow waters does not mean you can become complacent about your personal safety out on the water.

You can drown in six inches of water if you are some how knocked out so never take a risk even in the shallows where you think you are perfectly “safe”.

A PFD(personal flotation device) for every person on board is absolutely crucial.

The boat itself should have all of the necessary onboard safety equipment that is required by the lay in your state.

Even if you have a small boat you should still have at a minimum flares, first aid kit, cellular phone and GPS.

You should also be very familiar with the tides and the area you intend on fishing in.

7. Fishing License 

Depending on where you are fishing a license is almost always a legal requirement. 

Gigging is no different.

Make sure you have an up to date fishing license for your state and that it is suitable for salt water fishing i.e it has a salt water stamp on it.

Keep it with you at all times and in a safe and dry place. I like to keep all my valuables like car keys and wallet in a water tight plastic box that floats. This is where I also keep my license.

8. Bug Spray

Bug spray is something that is commonly forgotten. Bugs love to swarm around vegetation and water and when you are gigging you will be in close to the shallows not always but quite often close to vegetation and small trees like mangroves.

I don’t know about you but mosquitoes seem to love my blood and if there are any around I always seem to be the main item on the menu.

A decent insect repellent can help to massively restrict any bites or stings that you potentially may get.

Personally I won’t go fishing without it.

Open post
Flounder GiggingBoat

Flounder Gigging Boat

Flounder boats give you the ability to cover a lot of water and pretty much float over any type of bottom no matter how muddy it may be. The best choice for a flounder gigging boat is a flat bottomed boat with a shallow draft.

Flounder Gigging Boat Setup

Take a small flat bottomed stiff or Jon boat and add a few gigging necessities and you can have your a pretty good flounder gigging boat setup.

Below we’ll list the bare minimum that you’ll need to get started.

Boat

A standard v-shaped boat will not be the best option for gigging.

The only choice here is for a flat bottomed both with a shallow draft.

How shallow a draft do you need?

Well that depends on the type of waters you will be fishing and just how deep it needs to be.

Bare in mind that the draft will be very different once fully loaded with potentially 3-4 people, several gig poles, fuel, additional lights, food and drink coolers and all of your other gear.

Having the ability to float in as little as 4 or 5 inches of water is what you should be aiming for.

The larger commercial type flounder boats will have a custom built front platform, extra guard rails, electric trolling motor, a host of electronics and some will even have an air motor mounted on a rear arch so as to reduce the amount of disturbance the boat makes in the water.

All of these things add weight.

So, if you are just looking for a small flounder gigging boat for your self and a few buddies then it’s always best to try and keep the weight down so that you can take advantage of a shallower draft.

Length wise anywhere from 16 feet and up. Just be careful that you may need to travel out into the deeper waters to access whatever bay or flats that you are looking to gig over. So be careful that your boat is sea-worthy in roughly sea’s.

Also Read: Flounder Jigging

Lights

Lights are crucial when out at night. You’ll find it is much easier t find the flounder at night when using a light compared to during the day. The refection from their eyes makes it much easier to spot them.

Flounder lights these days will almost always be LED’s. Older style 12v lights are just too hard on your battery. Especially if you are out for hours on end.

Depending on your boat there are a number of different options as to where to place you lights.

At minimum you’ll need on two on the bow one on each side. A strong handheld lamp and then I always wear a high powered adjustable LED head lamp.

The head lamp gives you great hands free control right before you go for the flounder.

Motor

Your main motor needs to be matched to the size and displacement of you boat for flounder gigging. 

A additional motor is always a good option. An electronic trolling motor with a foot control pedal can make life much easier.

You can also mount an air motor on the back so to minimize the amount of underwater noise that you create but this is more a luxury than a necessity and is only really suitable on larger skiffs.

Guard Rails

Adding on additional guard rails make is much easier to lean over and strike the flounder with your gig. The give you something to balance on and are a added safety measure.

They are also used for either lashing or mounting lights onto. The lights can be angled down and finding a good mounting bracket to fix to the rails can be far superior to any underwater mounted lights.

Electronics

Although a fish finder with a GPS is not an absolute must to have onboard it will make your life a whole lot easier.

Even a handheld GPS is still worthwhile but with the fish finder you get builtin depth sounder and access to a huge amount of maps and mapping functionalities depending on the brand and model.

With fish finders you can spend a little for a basic unit up to a few hundred dollars or splash out on a unit with all the bells and whistles which can run into the thousands.

Having the ability to accurately gauge the depth of the bottom is crucial.

Safety Equipment

Safety Equipment on your flounder boat should not be an after thought.

A lot of fishermen make the mistake of coming complacent about where they are fishing. Just because you are moving over shallow waters all the time does not mean that you cannot get into trouble.

Drowning is nothing to take likely on any type of water. You can drown in six inches of water.

Don’t take risks with your personal safety or the other people you may have on board especially if they are inexperienced at being out on the water.

Personal flotation devices(PFD’s) should be warn by all people aboard your gigging boat. Modern PFD’s are super light weight and will not get in your way no matter what you think.

A first aid kit should always be on board and should be stored in a place where it can be accessed in an emergency.

Emergency flares should also be stored in a cool airtight location.

These items are all basic seamanship and should not be ever forgotten.

A fully working radio that allows you to receive weather updates for the coast is also another crucial item.

Posts navigation

1 2 3 5 6 7 8
Scroll to top